|
MU's extensive gameplay not only allows the player to battle against the game's monsters, but interact with other players as well through features like Trading and PvP (Player versus Player) battles.
Party System
Party System | Trading System | Guild System | Battle System | Personal Store | Character Advancement | Chaos Machine / Pet Trainer
Game Guide | Back to Top
Party play is an aspect of MU gameplay in which different characters can form a group and adventure in the vast world of MU together. Cooperative hunting will allow you to take on extremely strong monsters that would be quite difficult if not impossible alone, and through party play, you will find that partying with different class characters will help you advance at a faster rate.
- Characters can create their own party at level 6 but may join a party at any level.
- Parties can have a maximum of 5 members.
- You may a party with anyone who is at most 120 levels below or above you.
- Career Level is motivated when in a party. *
* A party with different basic character classes gets more experience from monsters.
Career Level
Career Levels are affected when you are in a party with Dark Knights and/or Dark Sorcerers and/or Fairies. In a party that has more different character types; their party will receive a bonus in experience.
| 1 person |
100% |
100% |
| 2 people |
120% |
120% |
| 3 people |
140% |
160% |
| 4 people |
160% |
180% |
| 5 people |
180% |
210% |
How to Create a Party
In order to create a party, type "/Party" on the conversation window, hovering your mouse cursor over the character you want to create a party with. The player receiving an invitation to join a party can accept or reject the invitation.
You may receive party invites constantly while playing. If you do not want to be bothered, you can flag your "Request Off" option by typing /Request off. If you want to join a party again or simply accept invites, just turn it back to "Request On" by typing /Request on.
Leaving a Party
You can leave the party anytime during party play. In order to leave a party, press "P" and then click the X button on the party information window.
Party Chat
To chat with your party mates, put the "~"sign in front of every message you want only them to see.
e.g. "~hey guys, let's move to Lost Tower to train!"
Trading System
Party System | Trading System | Guild System | Battle System | Personal Store | Character Advancement | Chaos Machine / Pet Trainer
Game Guide | Back to Top
Trading is an important aspect of the game. This can improve your personal relationships with other players and help you improve your equipment.
 |
While playing MU, you may encounter certain situations in which trading Zen, a form of currency used in MU, or the trading of items with other players will be necessary. When exchanging an item, you drop your item on the field and the |
other player may pick it up. For safe trading, however, it is advised that you make use of the trading system provided by MU. Facing the player that you wish to trade with and using your mouse, point towards the player you wish to trade with and type "/Trade" in the conversation window. The player with whom you have made a trading request has the option of accepting or rejecting your request. |
 |
Sometimes you may be interrupted by repeated requests for trade. In this case, you can block constant requests by flagging your "request off" option. Its function is to block all requests for trade, guild combat, etc. Flagging your "request on" option will make trade possible again.
After verifying the item(s) that a player who has made a request for trade placed in the Trade window, drag the item(s) you wish to trade into the trade window and press Confirm. A trade has been made. You can cancel a trade at anytime by pressing Cancel. |
A warning system indicates when the player you are trading with changes the item you are currently trading for. This will also disable the confirmation button for about 10 seconds. It may also warn you if the item you are currently receiving is a duplicated or illegal item. |
Trade System Details
Zen Color Changes
| 100,000 zen
| Green |
| 1,000,000 zen
| Orange |
| 10,000,000 zen
| Red |
Character Level Range and Color
You can check the level range of the characters you are trading with through the color indicator and the warning that appears on your trade window. This can help review the credibility of the characters that you are trading with.
| Level 10
| Red in
trade window |
| Level 1 - 49
| Red in
trade window |
| Level 50 - 99
| Orange in
trade window |
| Level 100 - 199
| Green in
trade window |
| Level 200 - 350
| White in
trade window |
Indication of names of the items in trade within the trade window
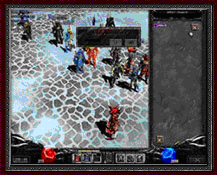
Guild System
Party System | Trading System | Guild System | Battle System | Personal Store | Character Advancement | Chaos Machine / Pet Trainer
Game Guide | Back to Top
Guilds play an important part in MU Online. They create communities for players whose goals are to help each other inside the game. Some guilds are also created to unite powerful players together. Guild rules differ depending on the guild master or the rules that were set during the creation of the guild.
How to Create a Guild
It is quite simple to create a guild: simply go to the guild minister NPC located in the center of Devias (215, 45) and apply for the creation of a guild. However, there are certain requirements that need to be met in order to create a guild.
- Guild master level should be at least 100.
- The guild name should be at least 4 characters long.
Guild Mark
After informing the guild minister NPC of your intention to create a guild, you should provide a guild name and create a guild mark. Once a guild name and guild mark have been created, no edits to either can be made so we strongly advise that you choose each with extreme care. |
 |
Quick Guild Guide
- Maximum guild capacity is 10% of the guild master's level.
- (e.g. Guild master = Level 350, 10% of 350 is 35. The guild can have up to 35 members.)
- Shortcut for the guild menu is "G".
- To invite someone into the guild, type "/guild" and point your cursor over the applicant.
- To propose a Guild Duel, type "/war (name of guild)"
- To propose a Battlesoccer challenge, type "/battlsoccer (name of guild)"
- To join a guild, type "/guild" and point your cursor over the Guild master.
- Guild Masters can put notes for the guild by using @ then the message
Disbanding or Leaving a Guild
In order to cancel/disband a guild you have just created, press "G" and then "Cancel". The canceled guild cannot be restored, so you should be careful when canceling it.
If you are already a guild member, not a master, and you wish to leave the guild you are currently in, you should press the button "Leave", instead of "Cancel". Unlike cancelation, leaving a guild will allow you to rejoin if the said guild is still available.
Guild Competition
Guild Duel
Command: /war (guildname)
A guild master has the ability and right to challenge another guild to a guild duel. Once the other guild accepts the duel, the members of both guilds can immediately attack each other.
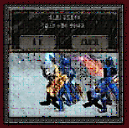
With the guild duel, there are no drops of items or of career levels. In the event that you are challenged to a guild duel from another guild master, the above screen will appear. If you do not wish to engage in a duel, you can reject the proposal by pressing "Cancel". While enjoying the game, you may be repeatedly challenged to a guild duel. In that case you can block requests by setting your option to "Request Off". Request Off is a function to block all incoming requests for trade, party play, and guild duel requests. Flagging your "Request On" option will make guild duel requests possible again.
Guild Battle Soccer
Command: /battlesoccer (guildname)
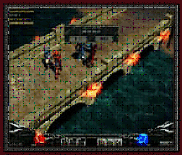
Another way for guilds to settle disputes in game is through a battle soccer challenge. In this game each guild consisting of 1-5 members on each team, formed as a party, can meet on the field and score points to try and defeat each other.
Scoring can be declared by killing the other team's players (available only in PvP servers) or by scoring points by hitting the ball into the other team's goal.
- Each goal is worth 20 points.
- Each player killed is worth 1 point (available only in PvP servers).
- First team to score 100 points wins.
Guild Allies/Enemies
Guild Alliance
Guild alliances allow guilds to form alliances with each other and is a requirement for a guild to take over the dragon castle in the Valley of Loren.
Each guild is allowed a minimum of 1 and a maximum of 2 allies.
A guild that will undergo an alliance must decide who will be the main guild in their alliance as the sub guilds will be considered subordinates of the main guild.
To determine the main guild for an alliance the sub-guilds must be the one to request an alliance with the main guild.
- Main Guild - The main guild's guildmaster will be considered the lord of the castle when the alliance takes over the castle.
- Allied Guilds - are considered support guilds or extensions that can help defend the castle.
Allied guilds' names will appear in green to indicate your alliance to them.
Guild Hostility
Guilds can now declare hotilities towards other guilds. When this is enabled all members of the opposing guild will appear as they are flagged for PK and no penalty will be given for attacking and killing members of the opposing guild.
Hostile guilds' names will appear red on your screen as if they were flagged as an outlaw. Attacking and defeating hostile guild members will not flag you as an outlaw.
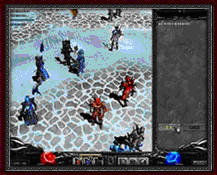
Battle System
Party System | Trading System | Guild System | Battle System | Personal Store | Character Advancement | Chaos Machine / Pet Trainer
Game Guide | Back to Top
The MU Online player versus player (PvP) system allows players to settle their own differences. Playing the hunter or the hunted adds flavor to the game.
Battle System
Through MU Online's advanced PK (Player-Killing) system, players can readily engage each other in combat while in specially assigned servers (non-PK servers are also available for new users and for those who do not wish to participate in the PK system). This prevents rampant kill stealing (where players keep following you and killing your enemies to steal exp and items) and lets players settle disputes among themselves.
- Press Ctrl + Mouse Click to force attack
It is simple to attack another player. While pressing the CTRL key, click the left mouse button over a character, allowing you to forcibly attack another player.
Self-Defense System
If you are attacked by an enemy without provocation, your character's self defense becomes activated. A character whose self defense is activated will not be penalized even though he kills the attacker in self-defense. In the event that an attacker wins a battle, the attacker will be penalized.
Chaos Level
This is a built-in retribution system that will punish all players who kill others repeatedly by branding them as killers. These killers in turn will be hunted by other players who wish to become Heroes.
| Status |
Name / Color |
Rate of item drop |
Exp loss on death |
Hours to become a commoner |
| Hero |
Blue |
1% |
2% |
1 |
| Commoner |
Pale Blue |
6.25% |
4% |
n/a |
| 1st stage outlaw |
Orange |
12.50% |
6% |
3 |
| 2nd stage outlaw |
Red |
25% |
8% |
6 |
| Murderer |
Dark Red |
50% |
10% |
9 |
* Reminder: Item drops will happen regardless of PK level (see Rate of item drop)
Murderer and Hero Status
Everyone starts out with a Commoner status with the player's name in a pale blue colour. Each Player-Kill (or PK) of a fellow player whose name is in a "blue", "pale blue" or "orange" colour will increase your murderer/killer status.
Your 1st player kill will change the colour of your name to "orange". The next player kill you commit while your name is coloured "orange" will change the colour to "red". Then, killing yet another player while your name is coloured "red" will change it to a darker red colour, the 3rd Killer Status. Each player kill you commit after the 3rd killer status will add an additional 3 hours to your time in that status.
To shorten your murderer status, you will need to kill monsters. The monster level of each creature you kill while in killer status will subtract an equal number of seconds from your pk timer.
If a player with commoner status kills another player with a murderer status in either the 2nd or the 3rd degree, then he/she will gain the Hero status.
Personal Store
Party System | Trading System | Guild System | Battle System | Personal Store | Character Advancement | Chaos Machine / Pet Trainer
Game Guide | Back to Top
|
The Personal Store is a new feature of MU Online. it allows players to vend their items for an amount of zen that they assign to it. The Personal Store can be activated upon reaching level 6 and will stay open even if you are moving around the map.
Opening the Personal Store
To activate the personal store you can press the "S" key on your keyboard or by opening your inventory and clicking the treasure chest icon on the lower right of your inventory screen. Once open, you can drag and drop items from your inventory into the personal store. Upon doing this the game will ask you for the price at which you would like to sell the item you placed into the personal store window. If there are existing items in the personal store, you can change the value of the items in the store by right-clicking on the item. This will open a window indicating what price you would like to vend the item for. |
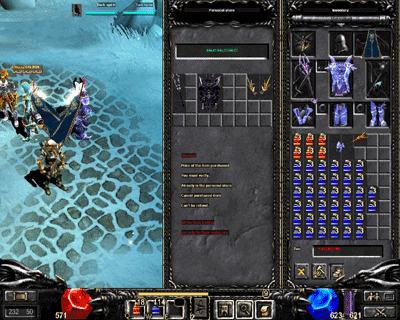 |
Command Key for Personal Store : " S" Key
you can price any item from 1 - 99,999,999 zen
Personal Store capacity is 4 x 8 blocks
To change the name of the personal store you can left-click the window on top of the store labeled "Enter the store name". You can enter a store name from 1 to 18 characters long.
After you have placed the designated amouts for the items that you want to sell and have named your store you can open the store by clicking the Open button at the bottom of the personal store. You will be asked for confirmation to open the store.
* Warning: Please check the prices of items that you are vending on your store as items sold in this manner are considered final transactions.
Buying goods from the personal store
To buy goods from the personal store you will have to open your command menu and activate your buy button, then highlight it on the player selling the items and right-click on the player.
When the personal store opens, you can drag items onto your inventory and it will deduct an appropriate amount of zen from your character.
Character Advancement
Party System | Trading System | Guild System | Battle System | Personal Store | Character Advancement | Chaos Machine / Pet Trainer
Game Guide | Back to Top
Basic character classes who have attained the required level have an option to change to their advanced classes. This advancement will change the character's title and would give him/her the ability to wear more powerful weapons, equipment and skills. This will also qualify them for the "Hero Status" quest offered by an NPC named Marlon in the future.
Quest Process and Requirements
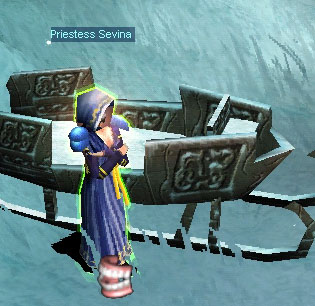
Class Advancement Trainer - Priestess Sevina
 |
Scroll of the Emperor |
- Basic Classes of Dark Knight, Dark Wizard and Fairy Elf must have reached at least 150 levels.
- The character must talk to Priestess Sevina to activate the quest.
- Priestess Sevina can be found in Devias.
- The quest is divided into 2 parts and both must be accomplished to advance.
- The first part of the Quest requires the character to pay 1 million zen and look for the Scroll of the Emperor.
- the Scroll of the Emperor can be found by killing monsters in Lost Tower 1 and higher maps.
- After finding the Scroll of the Emperor, the player must return the item to Priestess Sevina and accept the second part of the quest.
- Priestess Sevina will award 10 stat points for returning the Scroll of the Emperor.
- The second quest requires the character to pay Priestess Sevina 2 million zen and she will ask the character to retrieve an item (Broken Sword - Dark Knight, Soul of Wizard - Dark Wizard, Tear of Elf - Fairy Elf)
- Items needed for the second quest can be found by killing monsters in Lost Tower 7.
- After returning the item that the Priestess requested the quest will be completed.
- Priestess Sevina will award 10 stat points for returning the item requested and will upgrade your class as follows:
- Dark Knight -> Blade Knight
- Dark Wizard -> Soul Master
- Fairy Elf -> Muse Elf
 |
 |
 |
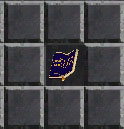
| Broken Sword |
Soul of Wizard |
Tear of Elf |
| |
|
|
 |
| Hero Status Quest - Marlon |
- Upon reaching 220 levels of an advanced class Marlon will allow characters to partake in the "Hero Status" Quest.
- Marlon will give 1 quest for Soul Master and Muse Elf and will grant 2 quests for Blade Knight.
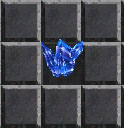
- The first quest will require 2 million zen and for the characters to find the Ring of Glory.
- The Ring of Glory can be found by killing monsters in the Tarkan area.
- Upon finding the Ring of Glory, the character must return to Marlon to complete the quest.
- Marlon will award a retroactive 1 stat point per character level past 220.
- e.g. a character level of 250 completing the quest will receive receive 49 additional stat points.
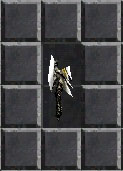
- For Blade Knights, Marlon will offer an additional quest to learn the combo ability. He will ask you to find the Dark Stone.
- Activating the quest will require the character to pay Marlon 3 million zen.
- The Dark Stone can be found by killing monsters in the Tarkan area.
- Upon returning to Marlon with the Dark Stone, he will award the Blade Knight with the Combo Skill.
 |
 |
| Ring of Glory |
Dark Stone |
Chaos Machine Guide
Party System | Trading System | Guild System | Battle System | Personal Store | Character Advancement | Chaos Machine / Pet Trainer
Game Guide | Back to Top
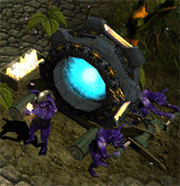 |
The Chaos machine is a wonderous device run by the Chaos goblins in Noria. This machine can craft wonderous items when instilled with the energies of Chaos gems. |
Interface
The Chaos system is a unique game function found in MU. By using item combinations via the Chaos Goblin, three high class items can be made: the Chaos Dragon Axe, the Chaos Nature Bow and the Chaos Thunder Staff. The Chaos system can also make three Wing items: Wings of Angel, Wings of Daemon and Wings of Butterfly. These 6 items cannot be acquired through hunting and is unique only to the Chaos System. For detailed specifications on the Chaos and Wing items, refer to the section of Items. |
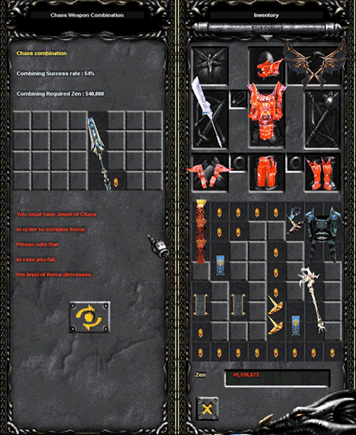 |
Chaos Machine Guide
| Location of NPC |
Noria, Coordinates (180,
100) |
| Name of NPC |
Chaos Goblin |
| Possible items to create |
1. Chaos Items - Axe,
Bow, Staff
2. Dinorants
3. Upgrades for weapons
4. Wings |
| Conditions for creations of Chaos items |
Jewel of Chaos + Item of
over level +4 base and +4 option + Zen cost |
| Conditions for creation of
wings |
Jewel of Chaos + Item of
over level +4 base and +4 option + Zen cost |
| Size of Chaos storage |
8 x 4 blocks |
| Combination success rate |
Combination of high class
items causes the combination success rate to increase up
to a maximum of 100% |
| Zen consumption |
Zen required increases with
the increase of success rate. |
- When item combinations are successfully done, all Zen and items used during the combination are consumed and new item(s) will be created.
- In the event that the combination process fails, all items and Zen used during the process are consumed or the level and options of item(s) may drop randomly.
- Regardless of the kinds of items used during the combination, new items are created randomly for all classes.
Chaos Machine Requirements
Combining to create Chaos items
- Talk with the Chaos Goblin located in coordinates (180, 100) in Noria.
- Use the option Chaos Weapon Combination
- In the 8 X 4 Chaos storage area, place:
- One or more Level 4 (minimum), Option 4% (minimum) items
- One or more Jewel(s) of Chaos.
- For the combination process, a specific amount of Zen is consumed.
- After confirming success rate, press the Combine button.
- Upon successful combination, one Chaos Dragon Axe, Chaos Thunder Staff or Chaos Nature Bow is randomly created and the items used during the combination process disappear.
- In the event that the combination process fails, all items and Zen used during the process are consumed or the level and options of item(s) may drop randomly.
Combining to create Wings
- Talk with the Chaos Goblin located in coordinates (180, 100) in Noria.
- Use the option Regular Combination.
- In the 8 X 4 Chaos storage area, place:
- One or more Level 4 (minimum), Option 4% (minimum) Chaos items
- One or more Jewel(s) of Chaos
- For the combination process, a specific amount of Zen is consumed.
- After confirming the success rate, press the Combine button.
- Upon successful combination, one pair of Angel Wings, Devil Wings or Fairy's Wings will be randomly created.
- In the event that the combination fails, all items and Zen used during the process are consumed or the level and options of item(s) may drop randomly.
Combining to create a Dinorant
- Talk with the Chaos Goblin located in coordinates (180, 100) in Noria.
- Use the option Regular Combination.
- In the 8 X 4 Chaos storage area, place:
- Ten (10) pieces Horn of Unicorn (all unicorns must have full life)
- One (1) Jewel of Chaos
- For the combination process, a specific amount of Zen is consumed.
- After confirming the success rate, press the Combine button.
- Upon successful combination, a Dinorant with random property would appear.
- In the event that the combination fails, all items and Zen used during the process are consumed.
Combining to upgrade item to +10
- Talk with the Chaos Goblin located in coordinates (180, 100) in Noria.
- Use the option Regular Combination.
- In the 8 X 4 Chaos storage area, place:
- One (1) base +9 (minimum) level item
- One (1) Jewel of Chaos
- One (1) Jewel of Bless for +10
- One (1) Jewel of Soul for +10
- For the combination process, a specific amount of Zen is consumed. After confirming the success rate, press the Combine button.
- Upon successful combination, item placed would be upgraded to +10.
- In the event that the combination fails, all items and Zen used during the process are consumed.
Combining to upgrade item to +11
- Talk with the Chaos Goblin located in coordinates (180, 100) in Noria.
- 2. Use the option Regular Combination.
- In the 8 X 4 Chaos storage area, place:
- One (1) base +10 (minimum) level item
- One (1) Jewel of Chaos
- Two (2) Jewels of Bless for +11
- Two (2) Jewels of Soul for +11
- For the combination process, a specific amount of Zen is consumed. After confirming the success rate, press the Combine button.
- Upon successful combination, item placed would be upgraded to +11.
- In the event that the combination fails, all items and Zen used during the process are consumed.
Combining to upgrade item to +12
- Talk with the Chaos Goblin located in coordinates (180, 100) in Noria.
- Use the option Regular Combination.
- In the 8 X 4 Chaos storage area, place:
- One (1) base +11 (minimum) level item
- One (1) Jewel of Chaos
- Three (3) Jewels of Bless for +12
- Three (3) Jewels of Soul for +12
- Six Million Zen
- After confirming the success rate, press the Combine button.
- Upon successful combination, item placed would be upgraded to +12.
- In the event that the combination fails, all items and Zen used during the process are consumed.
Combining to upgrade item to +13
- Talk with the Chaos Goblin located in coordinates (180, 100) in Noria.
- Use the option "Regular Combination".
- In the 8 X 4 Chaos storage area, place:
- One (1) base +12 (minimum) level item
- One (1) Jewel of Chaos
- Four (4) Jewels of Bless for +13
- Four (4) Jewels of Soul for +13
- For the combination process, a specific amount of Zen is consumed. After confirming the success rate, press the Combine button.
- Upon successful combination, item placed would be upgraded to +13.
- In the event that the combination fails, all items and Zen used during the process are consumed.
Combining to create Cape of Dark Lord
* Warning: Cape may drop when you get killed in PvP.
- Talk with the Chaos Goblin located in coordinates (180, 100) in Noria.
- Use the option Regular Combination.
- In the 8 X 4 Chaos storage area, place:
- One (1) Crest of Monarch
- One (1) Jewel of Chaos
- One (1) First Stage Wing
- For the combination process, a specific amount of Zen is consumed. After confirming the success rate, press the Combine button.
- Upon successful combination, item placed would be turned into a Cape of Dark Lord.
- In the event that the combination fails, all items and Zen used during the process are consumed.
Pet Trainer Guide
* Warning: Pets and Cape of Lord are considered droppable items and may drop when you get killed in PvP regardless of level and upgrade.
| Location of NPC |
Lorencia, Coordinates (122,110) |
| Name of NPC |
Chaos Goblin |
| Possible items to
create |
1. Dark Spirit
2. Dark Horse
|
| Conditions for creating
pets |
Jewel of Chaos + Jewel of
Creation + Spirit of appropriate type + Blesses and Souls
+ Zen cost |
| Other Functions |
You can pay the pet trainer to heal
Dark Lord pets' HP for a cost. |
| Size of Trainer storage |
8 x 4 blocks |
| Combination success
rate |
Combination of items to
create pets will go up to 60% |
| Zen consumption |
Appropriate amount of zen
varies according to HP to be healed or type of pet being
created |
- When pets reach 0 HP while using them they will be unable to attack and lose 10% of their experience points
- Spirit of Dark Horse monster drop level 102.
- Spirit of Dark Spirt monster drop level 96.
Combining to create Dark Spirit (Raven)
- Talk with the Trainer located in coordinates (122, 110) in Lorencia.
- Use the option Resurrect Spirit
- In the 8 X 4 storage area, place:
- One (1) Spirit of Dark Spirit
- Two (2) Jewels of Bless
- Two (2) Jewels of Soul
- One (1) Jewel of Creation
- One (1) Jewel of Chaos
- 1 million Zen
- After confirming the success rate, press the Combine button.
- Upon successful combination, one Dark Spirit would be resurrected.
- In the event that the combination fails, all items and Zen used during the process are consumed.
Combining to create Dark Horse
- Talk with the Trainer located in coordinates (122, 110) in Lorencia.
- Use the option Resurrect Spirit
- In the 8 X 4 storage area, place:
- One (1) Spirit of Dark Horse
- Five (5) Jewels of Bless
- Five (5) Jewels of Soul
- One (1) Jewel of Creation
- One (1) Jewel of Chaos
- 5 million Zen
- After confirming the success rate, press the Combine button.
- Upon successful combination, one Dark Horse would be resurrected.
- In the event that the combination fails, all items and Zen used during the process are consumed.
Fenrir Guide
- Level 300 above Blade Knight, Soul Master, Muse
Elf, Magic Gladiator and Dark Lord can use Fenrir.
- Repair and resurrection
- Horn of Fenrir can be repaired.
- Fenrir contains maximum durability and it will
decrease when damaged.
- Repair can be done using Jewel of bless.
- When repairing process fails Jewel of bless
will disappear but Horn of Fenrir
- Attacking
- Plasma storm is an exclusive skill which can
only be used when Fenrir is equipped. (Mana 50, AG 20)
- Plasma storm will not damage any other characters
except the target during PvP.
- Can be used during Castle Siege but it can also
damage the same team.
Fenrir Combination
Stage 1
- Talk with the Chaos Goblin located in coordinates
(180, 100) in Noria.
- Use the option Regular Combination.
- In the 8 X 4 Chaos storage area, place:
- 20 pieces of Broken Armor
- 20 pieces of Devine Protection
- 1 Jewel of Chaos
This combination will produce a Piece of Horn (100%
success rate)
Stage 2
- Talk with the Chaos Goblin located in coordinates
(180, 100) in Noria.
- Use the option Regular Combination.
- In the 8 X 4 Chaos storage area, place:
- 5 Piece of Horn
- 10 pieces of Claw of Beast
- 1 Jewel of Chaos
This combination will produce a Broken Horn (75%
success rate)
Stage 3
- Talk with the Chaos Goblin located in coordinates
(180, 100) in Noria.
- Use the option Regular Combination.
- In the 8 X 4 Chaos storage area, place:
- 1 Broken horn
- 3 Jewels of Life
- 1 Jewel of Chaos
- 10M zen
This combination will produce a Horn of Fenrir (35%
success rate)
No way to change %.
Upgrading the Horn
- Talk with the Chaos Goblin located in coordinates
(180, 100) in Noria.
- Use the option Regular Combination.
- In the 8 X 4 Chaos storage area, place:
- One (1) Horn of Fenrir
- Five (1) Jewel of Life
- One or more Level 4 (minimum), Option 4% (minimum)
Weapon
Combination will produce a random mix which can be
one of the following:
Black Fenrir - Horn of Fenrir + Destruction (increase
final damage)
Blue Fenrir - Horn of Fenrir + Protection (absorb final damage) |